game101
Bring Entity and its manager
Now I have some tools to diplay thing, it’s time to get some object to display !
I am going to present a new class; the Entity class. And as this chapter’s title learn to us, I am goinf to create
another internal System to manage and take care of those objects; the EntityManager.
figure 1 - The Entity and its Manager diagram class
Entity
This Entity will be the base for any object that can be displayed (or not) and managed by the Game.
Note: An internal helper usage will consist in providing a fluent API to the Entity setters.
As I could have many of those entity on my screen I need to get some clear way to identify it. I’ll use a generated
internal id for unicity, and a name for developer usage, to get it more humankind, but this name will be defaultly
generated.
public class Entity {
    private static long index = 0;
    private long id = index++;
    private String name = "entity_" + id;
}
In the Entity definition we create the mechanism to initialize the id and name to some default values:
idis initialize with an internal index counter that is incremented on each Entity instantiation,nameis initialized to “entity_[id]” where id will be the current incremented index value.
But we wan to display our entity, so we need more attributes :
x,ythe position on the play area of thiat object,widthandheight, the current size of that object (in a Rectangle box first, this will change on the future),dx,dysome speed information
public class Entity {
    //...
    public double x;
    public double y;
    public double dx;
    public double dy;
    public double width;
    public double height;
}
We also need to draw it, so add some graphics information:
borderColora border draw color,fillColora color to fill our entity with.
public class Entity {
    //...
    public Color frontColor = Color.WHITE;
    public Color fillColor = Color.BLUE;
}
EntityManager
One system to rules them all.
This System will be a very basic one, based on the Map pattern to maintain the internal entity list.
public class EntityManager {
    // [1]
    Map<String, Entity> entities = new ConcurrentHashMap<>();

    // [21]
    public EntityManager() {
    }

    // [3]
    public Entity get(String name) {
        return entities.get(name);
    }

    // [4]
    public void add(Entity e) {
        entities.put(e.getName(), e);
    }

    // [5]
    public Map<String, Entity> getEntityMap() {
        return entities;
    }

    // [6]
    public Collection<Entity> getEntities() {
        return entities.values();
    }
}
- create a Map of Entity to easily retrieve an Entity on its name,
- get an entity on its name (from the map),
- Add an entity to the map,
- retrieve the full map of entity
- get the collection of the existing Entities from the map.
In the Game
So, back to the Game class, we need to add this new system to support entity, and we also need to draw those entities.
public class Game {
    //...
    EntityManager entityMgr;

    //...
    public void initialize() {
        //...
        entityManager = new EntityManager();
    }
//...
}
Let’s add some Entity:
public class Game {
    public void create() {
        Entity player = new Entity("player")
                .setSize(16, 16)
                .setPosition(100, 100)
                .setSpeed(0, 0);
    }

    //...
    public EntityManager getEntityManager() {
        return entityMgr;
    }
}
And if we want to let the Renderer draw that entity, we need to modify it a bit.
Renderer draw Entity
Go to our already created Renderer class and update it to draw some Entity:
public class Renderer {
    //...
    public void draw(int fps) {
        Graphics2D g = (Graphics2D) buffer.getGraphics();
        // clear buffer with default color;
        g.setColor(Color.BLACK);
        g.fillRect(0, 0, screenWidth, screenHeight);

        // [1]
        game.getEntityManager().getEntities().forEach(e -> {
            drawEntity(g, e);
        });

        g.dispose();
    }

    public drawEntity(Graphics2D g, Entity e) {
        // [2]
        if (Optional.ofNullable(e.fillColor).isPresent()) {
            g.setColor(e.fillColor);
            g.fillRect((int) e.x, (int) e.y, (int) e.width, (int) e.height);
        }
        // [3]
        g.setColor(e.borderColor);
        g.drawRect((int) e.x, (int) e.y, (int) e.width, (int) e.height);
    }
//...
}
- parse the collection of Entity provided by the EntityManager,
- draw if fillColor is not null a filled rectangle,
- draw a borderColor rectangle.
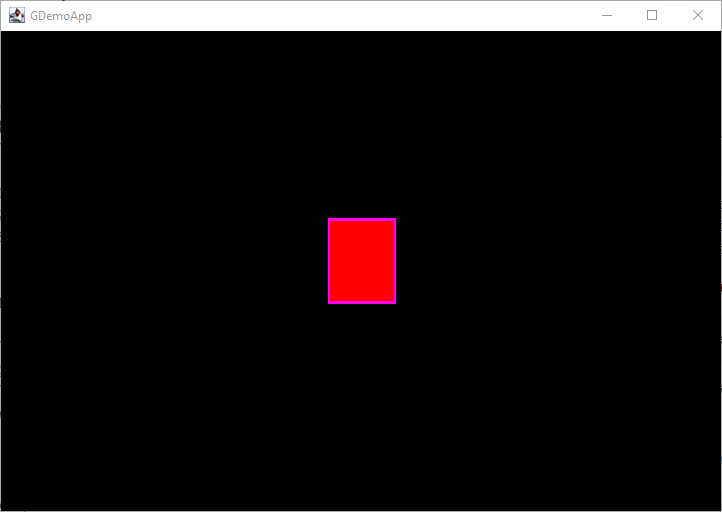
If you run this program
gradle run
You will get the following window displayed:

Conclusion
We finally get some entities, create some of them and draw these to the screen.
Like in the 3 first episodes, you can get code from the GitHub repository you already know now: https://github.com/SnapGames/game101 on tag create-entity.
That’s all falk!
McG.